CSS Elements: Add/Delete CSS Class
Being able to retrieve elements using CSS is one of the hallmarks of jQuery. jQuery goes one step beyond that and even allows us to add or remove a class to an object on-the-fly. For that, jQuery is armed with two methods: .addClass() and .removeClass().
Let us begin by listing these two methods and their variants.
| Selection | Description |
|---|---|
| .addClass("className") | Adds "className" class(es) to the element |
| .addClass(function(indx, classNames) {}) | Adds class(es) returned by the function |
| .removeClass(".className") | Removes "className" class(es) from the element |
| .removeClass(function(indx, classNames) {}) | Remove class(es) returned by the function |
If needed, both of these methods can add or remove multiple classes in one-shot. Thus, if we want to add two classes, "className1" and "className2" then we can do that in one shot by specifying both classes as arguments and separating them using a space: .addClass("className1 className2"). Along the same lines, if we wanted to remove multiple classes in one shot, then we can do that in a similar fashion as well: .removeClass("className1 className2").
Both of these methods also accept a function as an argument. The function, in turn, accepts two arguments. The first argument is an index argument which represents the current index of a list element. This can come in handy for cases, where we want to use these two methods on a list. Both of these methods would automatically increase the index to point to the index of the current element of the list. The second argument is the name of the class (or classes) that are added to the current list element. Please note that in this function, the variable "this" represents the current list item.
Let us move and see two examples that add/remove a CSS class to HTML elements on-the-fly. Both examples use the same HTML structure. The HTML body consists an ordered list that has a CSS class, "classOl". In addition to this class, the examples also use style tag to define three CSS classes: "classRed", "classGreen", and "classBlue". These classes assign different colors. Next, the examples use two buttons to dynamically add/remove classes -- one for adding the class "classBlue" to these elements and the other for removing this class from these elements.
For the jQuery logic, the HTML code sources a JavaScript file ("add_remove.jss"). For both examples, we keep the HTML code identical and simply update the sourced file. Here is the HTML file:
 <!doctype html>
 <html>
 <script type="text/javascript" src="https://ajax.googleapis.com/ajax/libs/jquery/1.9.1/jquery.min.js">
 </script>

 <body>
 <style type="text/css" class="classStyles">
   .classRed {color: red; font-weight: bold}
   .classGreen {color: green; font-weight: bold}
   .classBlue {color: blue; font-weight: bold}
 </style>

 <div>Nobel Laureates:</div>
 <ol class="classOl">
     <li class="classDummyChemistry">Marie Curie (Chemistry, 1911)</li>
     <li class="classDummyPhysics">Albert Einstein (Physics, 1921)</li>
     <li class="classDummyPeace">Mother Teresa (Peace, 1979)</li>
 </ol>

 <button id="idButtonAddClass">Add Class</button>
 <button id="idButtonRemoveClass">Remove Class</button><br>

 <script type="text/javascript" src="add_remove.js"></script>
 </body>
 </html>
When the page loads, none of the HTML elements belong to the "classBlue" class. The example aims to add this class dynamically to the elements of the "classOl" list. We do that in the "add_remove.js" included JavaScript file (provided below). This script sets the click handlers for both of the buttons. For the button with CSS ID "idButtonAddClass", the click event is set for adding the class. For the button with CSS ID "idButtonRemoveClass", the click event is set for removing the class. We would revisit the click() event in a later section.
 // Filename: add_remove.js

 $(document).ready(function() {
     // Assign a handler to button with id "idButtonAddClass".
     $("#idButtonAddClass").click( function() {
         $(".classOl").addClass("classBlue");
     });

     // Assign a handler to button with id "idButtonRemoveClass".
     $("#idButtonRemoveClass").click( function() {
         $(".classOl").removeClass("classBlue");
     });
 });
To run this example, let us go ahead and load the HTML page on a browser. Upon loading, here is what we would see:
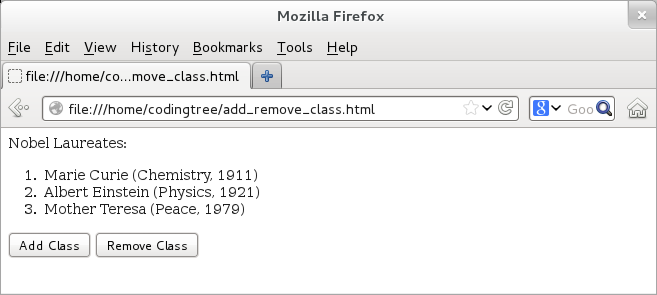
Figure: Adding/Deleting Class: Loading the page.
When we click the "Add Class" button, we would see that the list elements now have font-color as blue and font-weight as bold. This is because we have added the "classBlue" CSS class to them. If we were to remove the class, all we would have to do is to click the "Remove Class" and we would see the list elements returning to their earlier font properties.
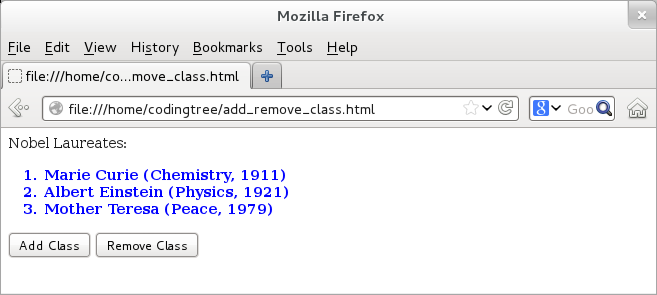
Figure: Adding/Deleting Class: After clicking "Add Class".
The .addClass() and .removeClass() methods also accept a function as an argument. We can add an index argument to the function for cases, where we want to invoke these methods for a list. Both of them would automatically increase the index to point to the index of the current element of the list. In addition, we can also pass a second argument to this function, which holds the current class names of the object. Within this function, the "this" parameter always points to the current element.
Let us extend our earlier example to demonstrate how we can pass a function as an argument to both of these methods. For that, we make a few tweaks in the included "add_remove.js" file. First, we add two more classes to our style, "classRed" and "classGreen" in addition to "classBlue". Second, instead of accessing ".classOl", we now access $("li") when calling .addClass() and .removeClass(). The reason for that is when we select $("li"), we would get a list that would consists of all the three list elements. However, when we select $(".classOl"), we would only get one element, which is the ordered list; of course, it would have three child nodes, but with $("li"), we get a list immediately.
When we call .addClass() and .removeClass(), we use both parameters to the function: index and classNames. The values passed by these parameters would pertain to those of the current element pointed in the iteration. To confirm that, we print both the index and the classNames passed and append the text to the HTML body using $("body").append().
Here is the updated "add_remove.js" file:
 // Filename: add_remove.js

 // Build a JavaScript list with class names.
 var listClasses = ["classRed", "classGreen", "classBlue"];

 $(document).ready(function() {
     // Assign a handler to button with id "idButtonAddClass".
     $("#idButtonAddClass").click( function() {
         $("li").addClass( function(index, classNames) {
             $("body").append("<br>.addClass(): " + index + "--" + classNames);
             if (index >= 3) {
                 return "";
             } else {
                 return listClasses[index];
             }
         });
         $("body").append("<br>");
     });

     // Assign a handler to button with id "idButtonRemoveClass".
     $("#idButtonRemoveClass").click( function() {
         $("li").removeClass( function (index, classNames) {
             $("body").append("<br>.removeClass(): " + index + "--" + classNames);
             if (index >= 3) {
                 return "";
             } else {
                 return listClasses[index];
             }
         });
     });
 });
Let us load the page and then click "Add Class" button. With that, we would see the output provided below. We can see that all of these elements have different index values and different CSS classes attached with them: "classDummyChemistry", "classDummyPhysics", and "classDummyPeace".
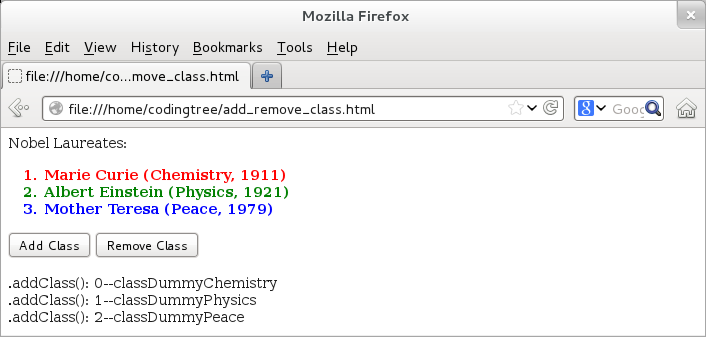
Figure: Adding/Deleting Class using the function-variant: After clicking "Add Class".
Here is the output, when we click "Remove Class". We can see that all of these elements have different CSS classes attached with them. The "classBlue", "classRed", and "classGreen" classes were added in the earlier step, when we clicked the "Add Class" button. Hence, the output confirms that the function passes the index and the names of the classes associated with each element.

Figure: Adding/Deleting Class using the function-variant: After clicking "Remove Class".